Check out my Etsy shop!

Sunday, October 30, 2011

Baby boots!

I have been admiring these cute boots that I had seen on Pinterest and I thought maybe I should see if I could make my own pattern and make some of my own.  When I make a pattern I have to make it several times before I get it just right.

I started with these yellow and black cotton boots and decided I had to make more.  Not only to perfect the pattern but because they turned out so cute!

I added the black and white buttons and it really finished them.

I then decided I would try some pink ones.  I did these with a smaller hook so they came out a little smaller, but I still liked how they were looking.

I made the soles a different color because I like the contrast.

Then added the bows, because pink just needs bows!

The next pair I made was blue and green and I made these with the smaller hook and the yarn was a little more chunky.  I liked the tighter weave on these and loved the colors.

Just makes me want to make a pair for myself!


Yes, I like this pattern!! They make up quickly and are so fun to make. I will definitely be making more of these cute boots.


Sunday, October 23, 2011

It's sweater weather!

When I started making these sweaters, I didn't know how addicting they would become. I finished another one that was the same pattern as my very first sweater, but I made it a little bigger.  I still need to make a bigger one for baby Jack, but I had these colors and I kind of liked the color combination.

I added the pink and green ribbon and pink buttons and I loved how it finished the sweater.

I am quite happy that I can make a sweater now and even though they take a lot of time, it is a real sense of accomplishment when  I am finished.

Here is the little sweater that I made for baby Jack and it was too small.

The football buttons finished this one as well.

I will have to find a tiny baby for this one.

and of course my sweater for Livy. I feel like maybe I have learned something in knitting!  The weather is getting cooler so it is definitely sweater weather which makes it definitely knitting weather!

Sunday, October 16, 2011

Felting

This last week we had a young woman teach us how to felt with wool. I have seen projects that are felted and even had bought some wool and some felting needles to try it out, but had never got around to it.  The wool comes like this in a variety of colors and then you get a felting needle to carry out the felting.

I bought a brush like this but that night we used a large chunk of foam to poke the felting needles in. This is a multiple felting needle but for my project I just used a single needle. The process is accomplished by making the shape that you want by poking the needle into the felt multiples of times until the felt sticks together on itself and will make the shape that you want. The needles are very sharp and have a little barb on the end that catches the wool and causes the wool to felt.

This is what I decided to make and yes, it is kind of primitive and I wasn't sure what I was doing, but you can tell what it is, right? It was kind of relaxing to do as long as you watched out where your fingers were and didn't poke a hole in the wrong place.


I looked up these images on Pinterest and found these cute little owls and decided maybe I should have felted mine a little tighter.


It was a good experience to see how the felting is accomplished.

He is kind of cute though.

Here are some more pictures of felted items that I found on Pinterest.

Too bad I didn't see this one when I was trying to make mine! This one is adorable.

This one looks a little spooky to me, it almost looks real. Great felting! It was a fun skill to learn and I will now have to try some more projects. Have a great week!!

Sunday, October 9, 2011

A gift for Livy

I started this sweater for Livy at the first of the summer thinking, I should be able to have it done by her birthday in September.  With the help of a long road trip in August I finished the sweater! I had some different colors of yarn that I thought coordinated well and started knitting.

I added the ribbons and polka dot buttons.

I looked all over for some red polka dot ribbon and finally found the perfect red.

I then decided that this sweater definitely needed a skirt to go with it.  Livy loves to wear dresses and skirts so the yellow flowered fabric matched perfectly with all of the colors that I had used.


This actually was the second skirt that I made because I was afraid that the first one would be too small.

So, I finished the first smaller skirt for her little sister, Sofia.

I added some more polka dots, this time in green. (Can you tell that I love polka dots?)


I packed up the sweater and skirts and off I went to visit the birthday girl!

This little girl loves birthdays!  It fit great!

Should have got a picture of both of them in their skirts.

She wore her birthday outfit all day.

Happy Birthday Livy girl!

So glad you are in my life!


Sunday, October 2, 2011

A Halloween tour


It is October and I am always so excited to decorate for this month.  I am going to take you on a Halloween tour of decorating in my home. Do you remember the "eyeball" I made from last year, it has a different spot this year and is on top of my piano. I still love it!

The other one is across the room so they are kind of "eyeballing" each other.

Mr. Skeleton found a good place to take a rest.

My Welcome "Hogwarts" broom graces the front entrance.

This is a new addition this year and it was super easy to make.  I had an old red berry wreath that I had left out in the sun too long and it was faded and some of the berries had popped and the white was showing through the berries. Sorry, I didn't take a before picture. I just used some silver spray paint and painted the wreath and added a spooky sign and "ta DA", it was done!

Added a feather wreath to my old leaded window pane.

Some pumpkins to my pumpkin jars.

Some pumpkin heads to the top of the cabinet I just refinished.

More pumpkins and straw raffia to my front porch.


A wire pumpkin, some leaves and more pumpkins to the top of a flower pot.

Welcome to Hogwarts!

I had some pictures in my dining room that were just not looking to Halloween, so I had an idea!
 I went to the fabric store and bought some cream colored muslin.  I had the black contact paper that I got from Home Depot and I decided to do a picture wrap around my existing framed painting. I cut the muslin a little bigger than my frame and then sketched a spooky tree with an owl onto the back of the contact paper.  I just googled spooky silhouette tree, and found many to look at. Then I cut out the spooky tree from the contact paper.

Here is the sketch of the other tree onto the back of the contact paper.

Here is the first one that I did, next to the framed painting that I was covering up.  I turned the painting on top of the fabric and used duct tape to wrap it around the frame. I didn't pull the fabric tight enough on this one so you can kind of see the ripples in it. I figured it out better on the second one.

Now instead of a vegetable painting, I have a silhouette spooky tree pair that goes very well with the Halloween decor.


When Halloween is over I will just pull off the duct tape and roll up the fabric and save it for next year! Oh, the ideas I could do with this!

Love, the way it turned out!
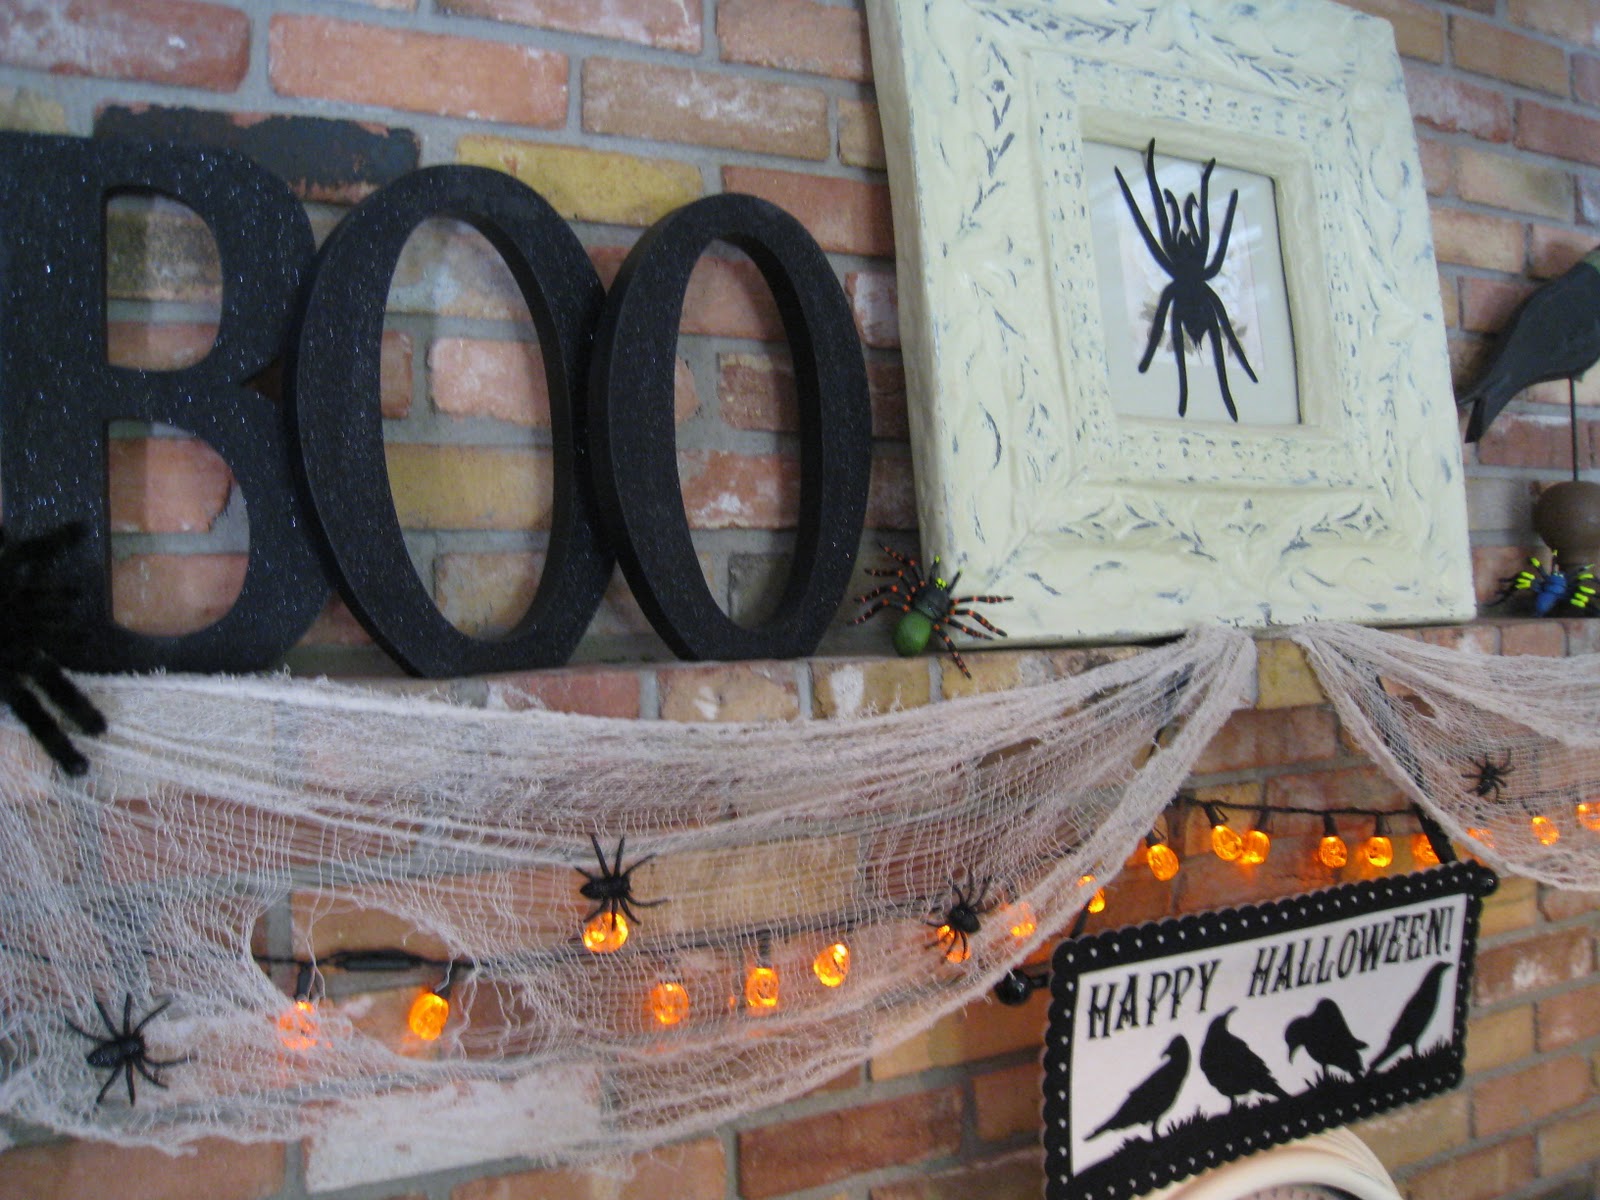
Now, a tour of the dining room mantle. I added another black contact silhouette spider to the existing framed flower I had sitting on the mantel.  It looks so much better with the spider for this spooky decorating. I added some gauze and spiders to curtain the mantle, some pumpkin lights, a big "BOO" and lots more spiders.

Added another "BOO" on some blocks of wood. Then topped the "BOO" with some painted pumpkins with painted polka dots, and of course more spiders!

Found this green spider fabric at the fabric store and sewed some tinsel around the edge.


Have some "Trick or Treats" with this bowl of eyeballs.

It's looking like Halloween!


I like the black and white look for this holiday.
Added my spider web to the front of these shelves.


Just have a few more pumpkins to add to outside and I am ready for all of the little spooks to come my way!
Happy October!


LinkWithin

Related Posts with Thumbnails